


软件

产品


Facenet的 pytorch 版本:GitHub地址:https://github.com/timesler/facenet-pytorch
CenterFace:GitHub地址:https://github.com/Star-Clouds/CenterFace
我是先跑通Centerface做 人脸检测 ,发现效果还可以,然后跑人脸识别项目facenet,发现其中的人脸检测模型MTCNN效果好像没有centerface好,然后就用centerface替换了Facenet中的MTCNN人脸检测算法,发现效果确实更好一点。
两个项目跑通都比较容易,可以去网上找博客或者好好读读官方文档即可。当然,你可以用你自己喜欢的人脸检测和识别 算法 ,自己组合,但前提是你首先得理解读懂别人的项目,然后才能开始改。
这里主要是对用Centerface做检测和Facenet做识别的新组合做解释。(项目是在Facenet原有基础上做改动)
改动后的项目结构和Facenet原有项目结构一致,不同的是将Centerface中的用于检测的脚本文件cnterface.py和与训练 模型 centerface.onnx复制到该项目下。我把centerface.py放到examples文件夹下,centerface.onnx放到models文件夹下。

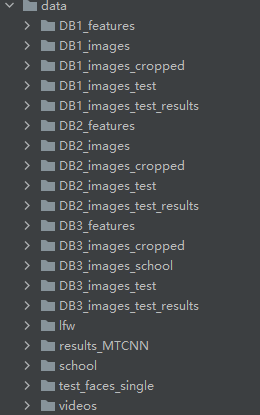
data文件夹下是自己建的一些数据库,可以用爬虫脚本自动创建,后面会给出代码。
以DB1为例
face_database.py
该脚本是用于创建人脸特征数据库的,即对一个人脸数据集,计算出每个人脸的特征向量并保存,用于后续识别。
from facenet_pytorch import MTCNN, InceptionResnetV1
import torch
from torch.utils.data import DataLoader
from torchvision import datasets
import numpy as np
import pandas as pd
import os
from centerface import CenterFace, FaceExtract


# creat a new database
# 要保证数据库中的图片只有当前人脸
def CreatNewDB(DB_images_path, feature_path, cropped_save_pth=None):
    # 定义了一个数据集
    # 读取路径下的所有文件夹,每一个文件夹为一个类别,有对应的标签index
    # 所有文件夹下的图片按顺序都存储在dataset中,dataset为可遍历对象,每张图片的格式为元祖(data,label)
    dataset = datasets.ImageFolder(DB_images_path)

    # dataset.class_to_idx将类别转化为数字索引
    dataset.idx_to_class = {

   i: c for c, i in dataset.class_to_idx.items()}
    # 定义一个数据加载器,一张图片表示为(data,label)的元祖
    loader = DataLoader(dataset, collate_fn=collate_fn, num_workers=workers)
    names = []
    for name in dataset.class_to_idx.keys():
        names.append(name)
    # 保存所有剪裁过后的人脸,用于求特征向量
    cropped_faces = []
    # 每个类别的人脸数
    num_each_class = 10
    # image为图片,index为name对应的标签
    j = 0
    for image, index in loader:
        centerface = CenterFace()
        w, h = image.size
        boxes, lms = centerface(image, h, w, threshold=0.6)
        print(f"{names[index]} 检测人脸数:{len(boxes)}")
        extractFace = FaceExtract()
        resnet = InceptionResnetV1(pretrained='vggface2').eval().to(device)

        # j表示一个name下的第几张图片

        # i表示第几个人脸框
        for i, box in enumerate(boxes):
            box, score = box[:4], box[4]
            # 存储cropped face,创建文件夹
            path = cropped_save_pth + dataset.idx_to_class[index]
            if not os.path.exists(path):
                os.makedirs(path)
            save_path = path + f'/{j}.jpg'
            # face为tensor
            face = extractFace(image, box=box, save_path=save_path)
            cropped_faces.append(face)
            # tensor([[...]])
            #face_embedding = resnet(face.unsqueeze(0)).detach()
            # 每张图片只保存一个人脸向量
            #embedings.append(face_embedding[0])
        j += 1
        # break
        if j % num_each_class == 0:
            j = 0

    aligned = torch.stack(cropped_faces).to(device)
    # 返回所有人脸的特征向量,每个向量的长度是512维
    embedings = resnet(aligned).detach().cpu()

    # 一个人有多个人脸,求平均特征向量
    # [tensor([...])]
    mean_embedings = []
    for i in range(len(dataset.idx_to_class)):
        emd = embedings[i * num_each_class:(i + 1) * num_each_class].mean(0)        # ???
        mean_embedings.append(emd)

    # dicts = [[(e1 - e2).norm().item() for e2 in mean_embedings] for e1 in mean_embedings]
    # print(pd.DataFrame(dicts, columns=names, index=names))
    if not os.path.exists(feature_path):
        os.makedirs(feature_path)
    # 将人脸特征向量和标签保存下来
    # 人脸特征向量和标签的index保持一致
    # names中的顺序应该和数据集类别的顺序相同
    torch.save(mean_embedings, feature_path + 'features.pt')
    torch.save(names, feature_path + 'names.pt')


# add a new face to existing database
def AddNewFace2DB():
    a = 1


# 将一个list的sample组成一个mini-batch的函数
def collate_fn(x):
    return x[0]


if __name__ == "__main__":
    # os.name返回当前操作系统名字,nt为Windows,posix为linux
    # 线程数
    workers = 0 if os.name == 'nt' else 4
    device = torch.device("cuda:0" if torch.cuda.is_available() else "cpu")
    print(f"Running on {device}")

    DB = 3
    DB_path = f"../data/DB{DB}_images_school/"
    cropped_path = f"../data/DB{DB}_images_cropped/"
    feature_path = f"../data/DB{DB}_features/"
    CreatNewDB(DB_path, feature_path, cropped_path)
test_new_face.py
该脚本用于识别测试集中的人脸。实现了三个函数:detect_one用于识别单张图片,detect_multi识别一个数据集,detect_videos用于视频人脸识别。
from facenet_pytorch import MTCNN, InceptionResnetV1
import torch
from PIL import ImageDraw, Image, ImageFont
from torchvision import datasets
from torch.utils.data import DataLoader
import os
import time
import cv2
import numpy as np
from centerface import CenterFace, FaceExtract


# mtcnn = MTCNN(keep_all=True)

# 识别单张图片
def detect_one(img, names, embeddings):
    # 定义检测和识别人脸模型
    centerface = CenterFace(landmarks=True)
    extractFace = FaceExtract()
    resnet = InceptionResnetV1(pretrained='vggface2').eval()

    # 自定义字体格式
    fontStyle = ImageFont.truetype("SIMYOU.TTF", 24)

    # Image对象读大小
    w, h = img.size
    boxes, lms = centerface(img, h, w, threshold=0.5)

    # face = mtcnn(img)
    # boxes, prob = mtcnn.detect(img)  # 人脸检测器,直接返回人脸的位置坐标和概率

    frame_draw = img.copy()
    draw = ImageDraw.Draw(frame_draw)
    print("检测人脸数目:", len(boxes))
    for i, box in enumerate(boxes):
        # 人脸框,分数
        box, score = box[:4], box[4]
        x1, y1, x2, y2 = box
        draw.rectangle(box, outline=(255, 0, 0), width=2)

        # 人脸提取,返回的是标准化后的tensor
        face = extractFace(frame_draw, box=box)
        # 增加tensor维度,resnet输入参数为4维
        face_embedding = resnet(face.unsqueeze(0)
免责声明:本文系网络转载或改编,未找到原创作者,版权归原作者所有。如涉及版权,请联系删
 技术文档
技术文档
 推荐好文
推荐好文


 155-2731-8020


