.png)
偶然看到一篇关于阿里新orm框架的文章,好奇的点了进去。开发后端多年,看到这个还是有点兴奋的。常用mysql的orm框架mybatis、jpa,到后来的优化框架mybatis-plus都是用过,他们或多或少都有优缺点吧。程序员本就是日常革新技术的职业,所以了解更多的框架绝对不会有错误。所以我尝试着把自己学习该框架的过程,记录下来,尽可能去掉一些项目工程中用不到的功能,展示一些实用有帮助的代码。
首先分享一下码云上的项目链接:码云地址
看一下官方给出的特性图
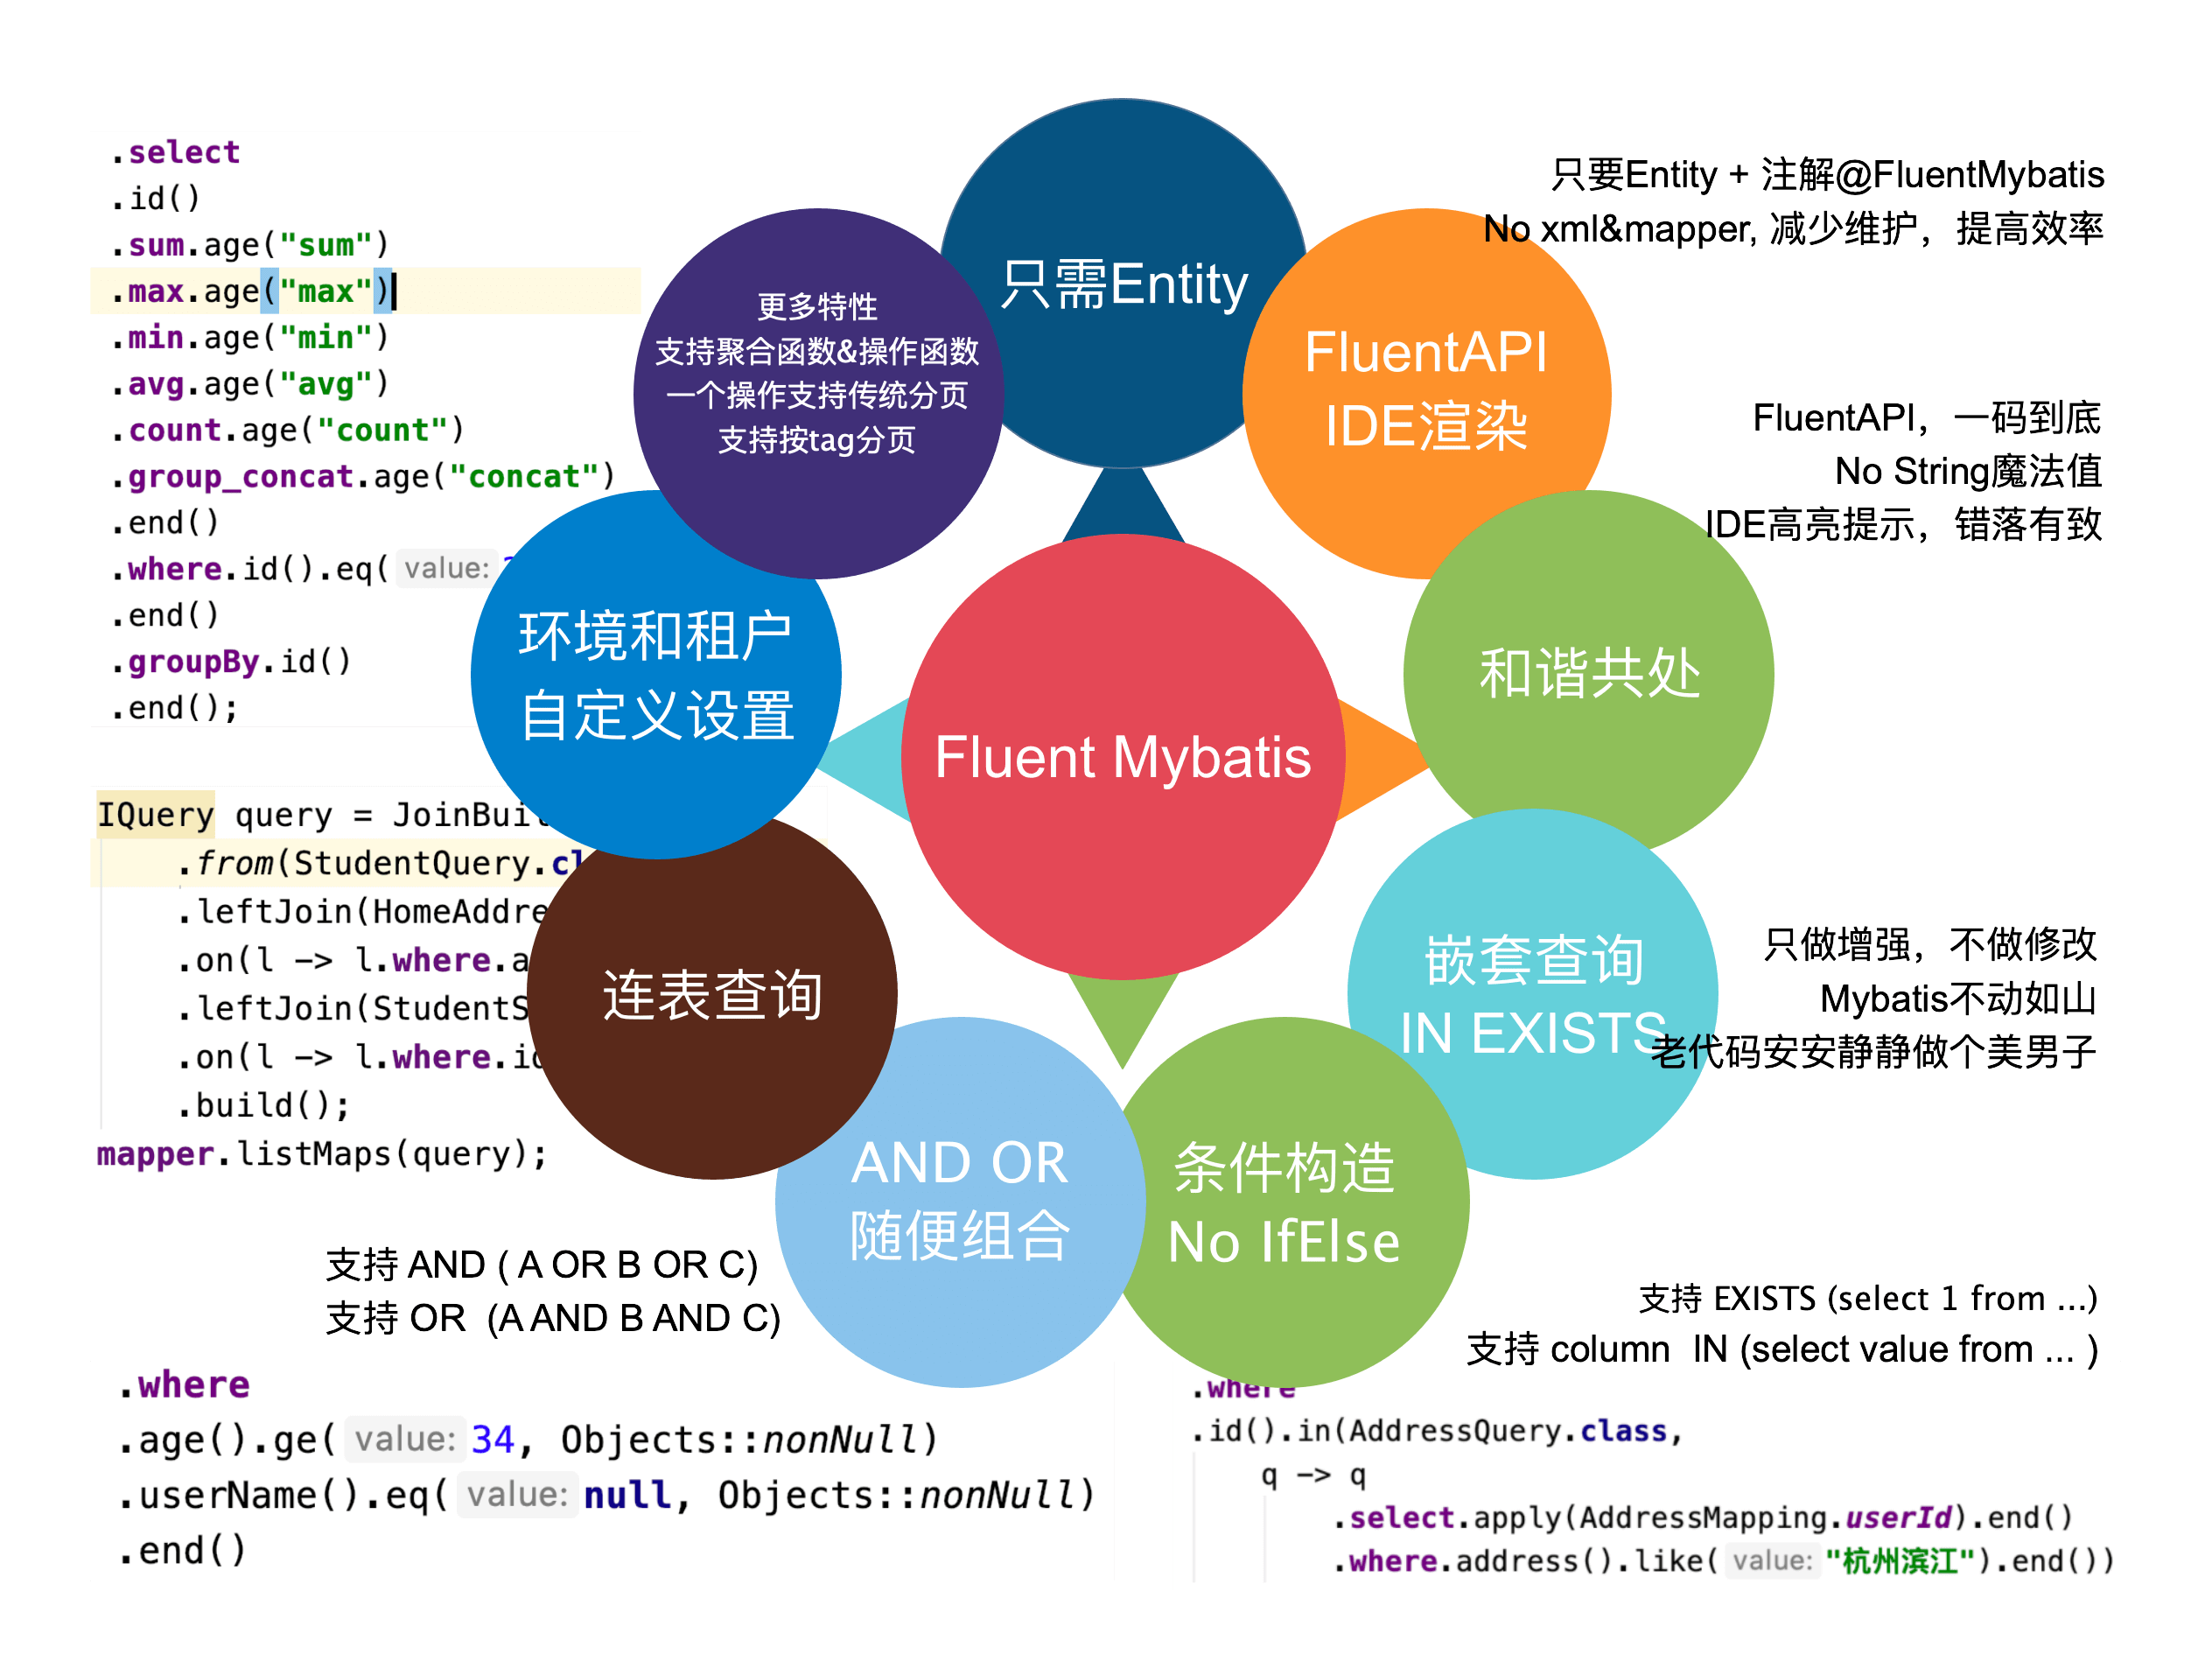
给出对几个特性乍一看还是很全面的,其中比较吸引我的是两点。
1、从图中给出的语法,和sql十分相近,不仔细看还以为是直接sql语句扔了上来。看上去就比较实用。
2、No xml&mapper,虽然mybatis-plus已经做到实用 IService接口实现大部分的sql操作
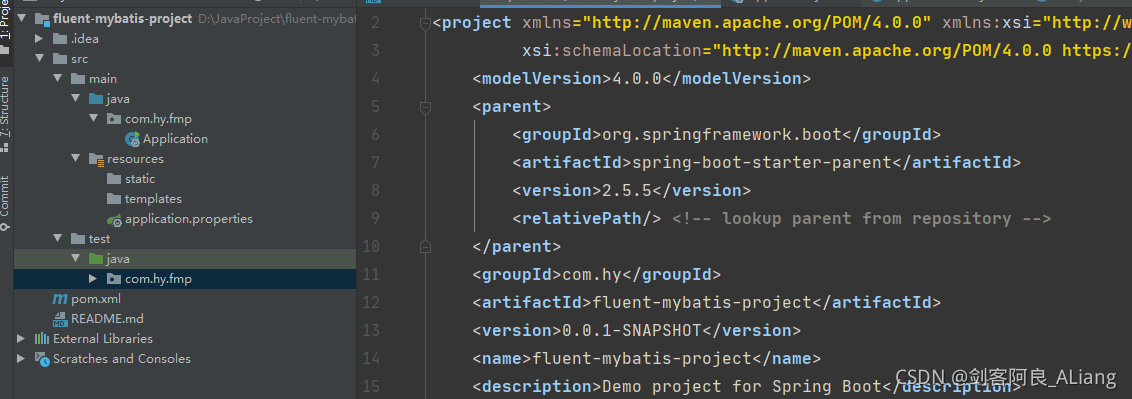
springboot搭建一项目的过程就不过多赘述了,这里说下我实用的springboot版本
1 2 3 4 5 6 | <parent> <groupId>org.springframework.boot</groupId> <artifactId>spring-boot-starter-parent</artifactId> <version>2.5.5</version> <relativePath/> <!-- lookup parent from repository --></parent> |
代码结构如下:
1 2 3 4 5 6 7 8 9 10 11 12 13 14 15 16 17 18 | <properties> <fluent-mybatis.version>1.8.7</fluent-mybatis.version></properties><dependencies> <!-- 引入fluent-mybatis 运行依赖包, scope为compile --> <dependency> <groupId>com.github.atool</groupId> <artifactId>fluent-mybatis</artifactId> <version>${fluent-mybatis.version}</version> </dependency> <!-- 引入fluent-mybatis-processor, scope设置为provider 编译需要,运行时不需要 --> <dependency> <groupId>com.github.atool</groupId> <artifactId>fluent-mybatis-processor</artifactId> <scope>provided</scope> <version>${fluent-mybatis.version}</version> </dependency></dependencies> |
完整maven依赖如下
1 2 3 4 5 6 7 8 9 10 11 12 13 14 15 16 17 18 19 20 21 22 23 24 25 26 27 28 29 30 31 32 33 34 35 36 37 38 39 40 41 42 43 44 45 46 47 48 49 50 51 52 53 54 55 56 57 58 59 60 61 62 63 64 65 66 67 68 69 70 71 72 73 74 75 76 77 78 79 80 81 82 83 84 85 86 87 88 89 90 91 92 93 94 95 96 97 98 99 100 101 102 103 104 105 | <?xml version="1.0" encoding="UTF-8"?><project xmlns="http://maven.apache.org/POM/4.0.0" xmlns:xsi="http://www.w3.org/2001/XMLSchema-instance" xsi:schemaLocation="http://maven.apache.org/POM/4.0.0 https://maven.apache.org/xsd/maven-4.0.0.xsd"> <modelVersion>4.0.0</modelVersion> <parent> <groupId>org.springframework.boot</groupId> <artifactId>spring-boot-starter-parent</artifactId> <version>2.5.5</version> <relativePath/> <!-- lookup parent from repository --> </parent> <groupId>com.hy</groupId> <artifactId>fluent-mybatis-project</artifactId> <version>0.0.1-SNAPSHOT</version> <name>fluent-mybatis-project</name> <description>Demo project for Spring Boot</description> <properties> <java.version>1.8</java.version> <fluent-mybatis.version>1.8.7</fluent-mybatis.version> </properties> <dependencies> <dependency> <groupId>org.springframework.boot</groupId> <artifactId>spring-boot-starter-web</artifactId> </dependency> <dependency> <groupId>org.springframework.boot</groupId> <artifactId>spring-boot-devtools</artifactId> <scope>runtime</scope> <optional>true</optional> </dependency> <dependency> <groupId>org.springframework.boot</groupId> <artifactId>spring-boot-configuration-processor</artifactId> <optional>true</optional> </dependency> <dependency> <groupId>org.projectlombok</groupId> <artifactId>lombok</artifactId> <optional>true</optional> </dependency> <dependency> <groupId>org.springframework.boot</groupId> <artifactId>spring-boot-starter-test</artifactId> <scope>test</scope> </dependency> <dependency> <groupId>org</groupId> <artifactId>jaudiotagger</artifactId> <version>2.0.1</version> </dependency> <dependency> <groupId>com.google.guava</groupId> <artifactId>guava</artifactId> <version>30.1.1-jre</version> </dependency> <dependency> <groupId>cn.hutool</groupId> <artifactId>hutool-all</artifactId> <version>5.5.2</version> </dependency> <!-- 引入fluent-mybatis 运行依赖包, scope为compile --> <dependency> <groupId>com.github.atool</groupId> <artifactId>fluent-mybatis</artifactId> <version>${fluent-mybatis.version}</version> </dependency> <!-- 引入fluent-mybatis-processor, scope设置为provider 编译需要,运行时不需要 --> <dependency> <groupId>com.github.atool</groupId> <artifactId>fluent-mybatis-processor</artifactId> <scope>provided</scope> <version>${fluent-mybatis.version}</version> </dependency> <dependency> <groupId>org.mybatis.spring.boot</groupId> <artifactId>mybatis-spring-boot-starter</artifactId> <version>2.2.0</version> </dependency> <dependency> <groupId>mysql</groupId> <artifactId>mysql-connector-java</artifactId> <scope>runtime</scope> </dependency> </dependencies> <build> <plugins> <plugin> <groupId>org.springframework.boot</groupId> <artifactId>spring-boot-maven-plugin</artifactId> <configuration> <excludes> <exclude> <groupId>org.projectlombok</groupId> <artifactId>lombok</artifactId> </exclude> </excludes> </configuration> </plugin> </plugins> </build> </project> |
在数据库创建一张测试表,表比较简单,先试试看。sql如下:
1 2 3 4 5 6 7 8 | CREATE TABLE `test_fluent_mybatis` ( `id` int NOT NULL AUTO_INCREMENT COMMENT '自增主键', `name` varchar(255) DEFAULT NULL COMMENT '姓名', `age` int DEFAULT NULL COMMENT '年龄', `create_time` datetime DEFAULT NULL COMMENT '创建时间', `del_flag` int DEFAULT NULL COMMENT '是否删除', PRIMARY KEY (`id`)) ENGINE=InnoDB DEFAULT CHARSET=utf8mb4 COLLATE=utf8mb4_0900_ai_ci; |
注意:放到测试代码包中。结构如下图:
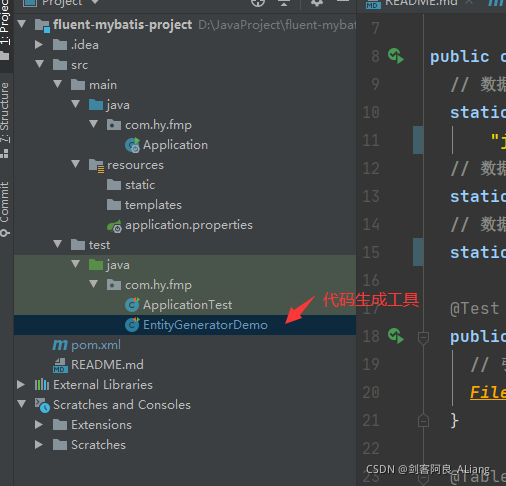
代码生成工具类代码,先按照官方给的简单样例来,如下:
1 2 3 4 5 6 7 8 9 10 11 12 13 14 15 16 17 18 19 20 21 22 23 24 25 26 27 28 29 30 31 32 33 34 35 36 37 38 | package com.hy.fmp; import cn.org.atool.generator.FileGenerator;import cn.org.atool.generator.annotation.Table;import cn.org.atool.generator.annotation.Tables;import org.junit.jupiter.api.Test; public class EntityGeneratorDemo { // 数据源 url static final String url = "jdbc:mysql://192.168.0.16:3306/test?useUnicode=true&characterEncoding=utf8"; // 数据库用户名 static final String username = "root"; // 数据库密码 static final String password = "123456"; @Test public void generate() throws Exception { // 引用配置类,build方法允许有多个配置类 FileGenerator.build(Empty.class); } @Tables( // 设置数据库连接信息 url = url, username = username, password = password, // 设置entity类生成src目录, 相对于 user.dir srcDir = "src/main/java", // 设置entity类的package值 basePack = "com.hy.fmp.fluent", // 设置dao接口和实现的src目录, 相对于 user.dir daoDir = "src/main/java", // 设置哪些表要生成Entity文件 tables = {@Table(value = {"test_fluent_mybatis"})}) static class Empty { // 类名随便取, 只是配置定义的一个载体 }} |
执行代码生成工具,看看都生成了些什么。
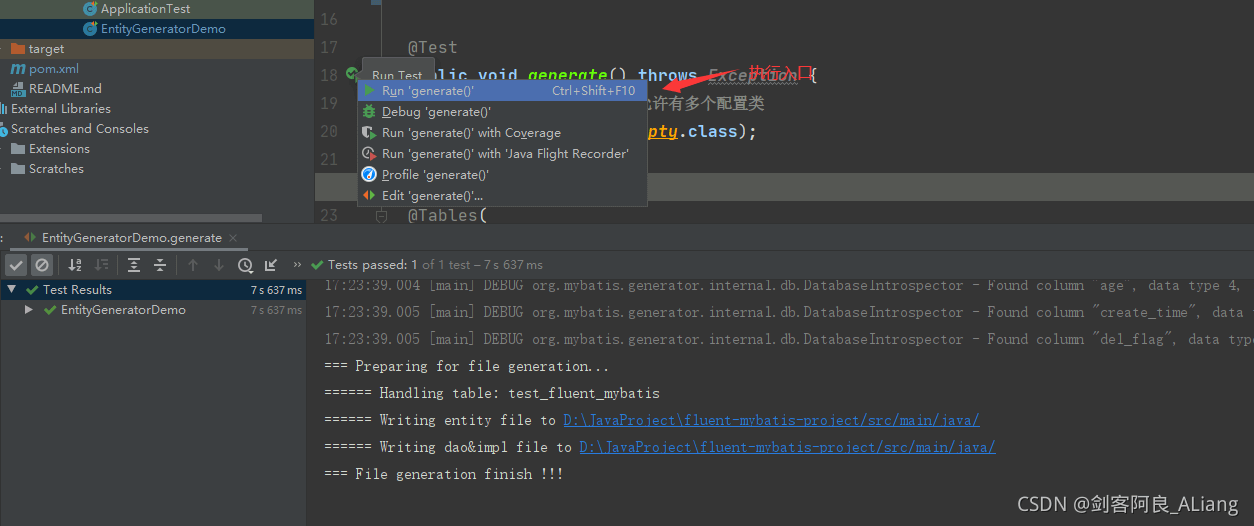
可以看到生成的包如下。

这里有个坑,看下面的截图
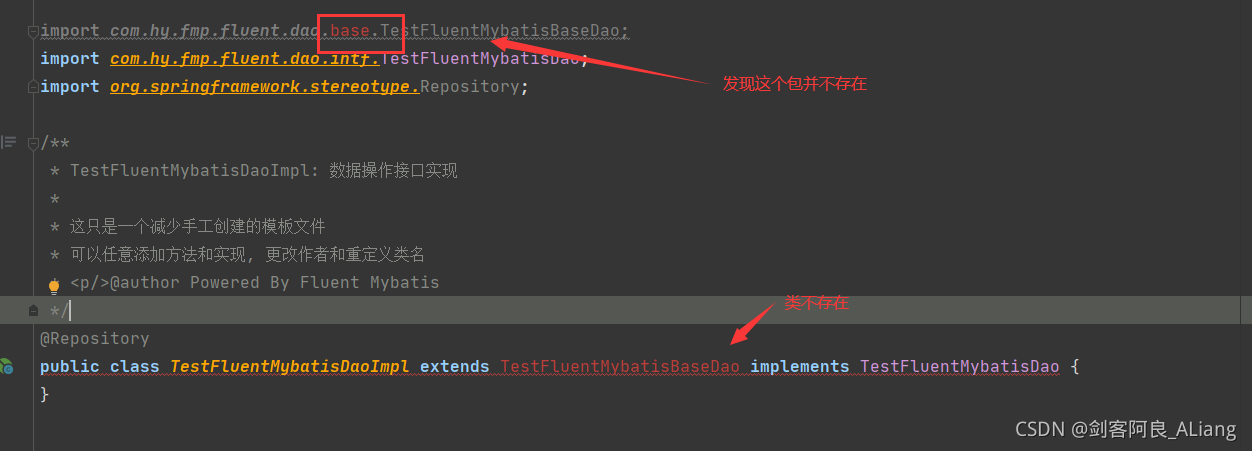
其实官方给了解决方法,只是没有对此说明。

简而言之就是你需要使用maven编译一下,所以我们compile一下。

编译结束后我们可以在target中,找到报错包位置中的编译文件。

之前报错的类已经不再报错了。完美。
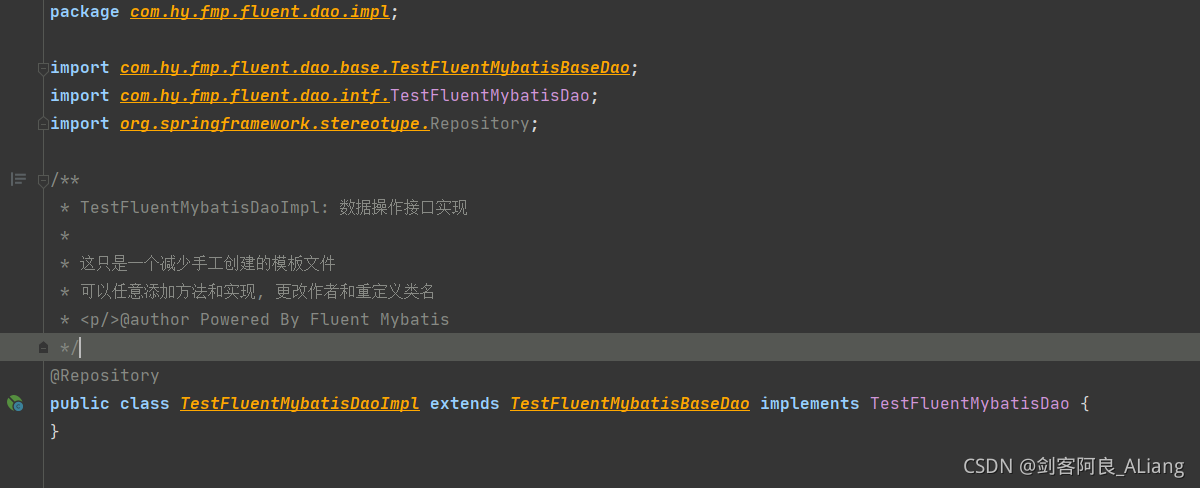
OK,现在项目和表代码都生成完成了,下一篇讲一下简单的操作。
文章链接:Java Fluent Mybatis实战之构建项目与代码生成篇下
Github代码链接: GitHub仓库
如果本文对你有帮助,请点个赞支持一下吧。

到此这篇关于Java Fluent Mybatis实战之构建项目与代码生成篇上的文章就介绍到这了,更多相关Java Fluent Mybatis内容请搜索脚本之家以前的文章或继续浏览下面的相关文章希望大家以后多多支持脚本之家!