


软件

产品


作为 TerminalMACS 的一个子进程模块 - React Web管理端,使用Ant Design Pro作为框架。
本文应用到的知识1.样式文件less中方法的使用2.for循环创建按钮和栅格布局(flex布局)
1. 最终效果及源码链接
作为前端新手的我,做下面这个简单功能花了好几天时间,问了不少前端大佬(大佬们应该要不到半个小时,惭愧惭愧),现在回想问的问题都很基础(有点丢人,哈哈),多谢了哦。
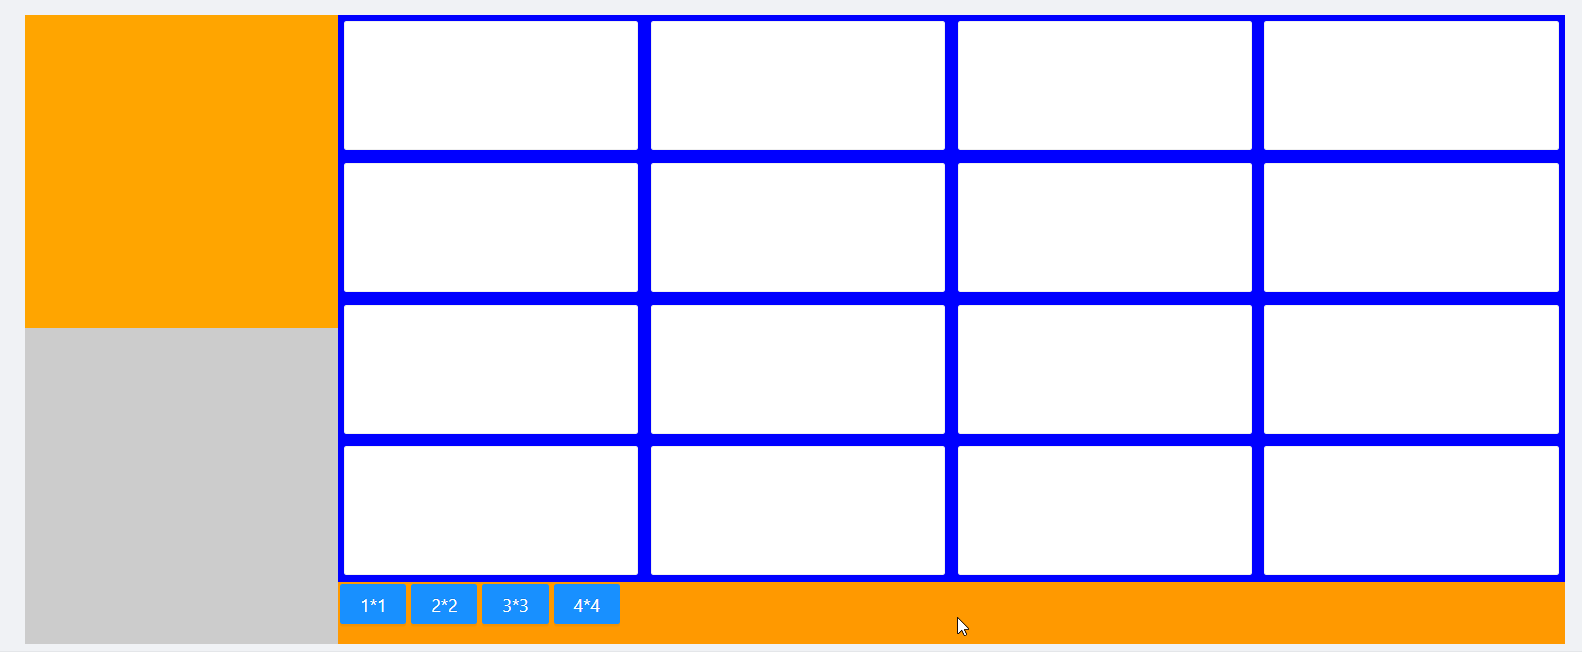
先看看效果
点击浏览源码:开源项目对应源码
2. 代码简单讲解
2.1 TypeScript代码
./src/pages/Grid/DynamicGridPage/index.tsx
|
1
2
3
4
5
6
7
8
9
10
11
12
13
14
15
16
17
18
19
20
21
22
23
24
25
26
27
28
29
30
31
32
33
34
35
36
37
38
39
40
41
42
43
44
45
46
47
48
49
50
51
52
53
54
55
56
57
58
59
60
61
62
63
64
65
66
67
68
69
70
71
72
73
74
75
|
import React from 'react';
import styles from './index.less';
import { Button, Card } from 'antd';
interface IVideoPanelProps {}
interface IVideoPanelSate {
cardCount: number;
}
class VideoPanel extends React.Component<IVideoPanelProps, IVideoPanelSate> {
constructor(props: Readonly<{}>) {
super(props);
this.state = {
cardCount: 1,
};
}
// 动态生成Grid
createCard() {
var res = [];
for (var i = 0; i < this.state.cardCount * this.state.cardCount; i++) {
res.push(<Card className={styles['video_panel' + this.state.cardCount]} />);
}
return res;
}
// 动态生成控制按钮
createControlButon() {
var res = [];
const btnCount = 4;
for (let i = 1; i <= btnCount; i++) {
res.push(
<Button
key={i}
className={styles['control_Button']}
type="primary"
onClick={() => {
this.changeCardCount(i);
}}
>
{i + '*' + i}
</Button>,
);
}
return res;
}
// 修改显示的格子数
changeCardCount(count: any) {
this.setState({
cardCount: count,
});
}
render() {
return (
<div className={styles.main}>
<div className={styles.main_child}>
<div className={styles.left}>
<div className={styles.left_top}></div>
<div className={styles.left_bottom}></div>
</div>
<div className={styles.right}>
<div className={styles.right_top}>{this.createCard()}</div>
<div className={styles.right_bottom}>{this.createControlButon()}</div>
</div>
</div>
</div>
);
}
}
export default VideoPanel;
|
代码不多,for循环生成控制按钮及栅格(未使用antd的Grid布局,简单使用div布局,flex很香),简化了很多代码。
2.2 less样式文件
./src/pages/Grid/DynamicGridPage/index.less
|
1
2
3
4
5
6
7
8
9
10
11
12
13
14
15
16
17
18
19
20
21
22
23
24
25
26
27
28
29
30
31
32
33
34
35
36
37
38
39
40
41
42
43
44
45
46
47
48
49
50
51
52
53
54
55
56
57
58
59
60
61
62
63
64
65
66
67
68
69
70
71
72
73
74
75
76
77
78
79
80
81
82
83
84
85
|
@import '~antd/es/style/themes/default.less';
.main {
position: absolute;
width: 100%;
height: 100%;
background: red;
}
@ptcWidth: 250px;
@btnAreaHeight: 50px;
@videoPanelMargin: 5px;
.main_child {
display: flex;
height: 100%;
}
.left {
width: @ptcWidth;
height: 100%;
background: green;
}
.left_top {
width: 100%;
height: @ptcWidth;
background: orange;
}
.left_bottom {
width: 100%;
height: calc(100% - @ptcWidth);
background: #ccc;
}
.right {
width: calc(100% - @ptcWidth);
height: 100%;
background: #f60;
}
.right_top {
width: 100%;
height: calc(100% - @btnAreaHeight);
background: blue;
display: flex;
flex-wrap: wrap;
}
.right_bottom {
width: 100%;
height: @btnAreaHeight;
background: #f90;
}
.control_Button {
margin: 2px;
}
.video_panel(@count) {
width: calc(100% / @count - @videoPanelMargin * 2);
height: calc(100% / @count - @videoPanelMargin * 2);
margin: @videoPanelMargin;
}
// 1*1
.video_panel1 {
.video_panel(1);
}
// 2*2
.video_panel2 {
.video_panel(2);
}
// 3*3
.video_panel3 {
.video_panel(3);
}
// 4*4
.video_panel4 {
.video_panel(4);
}
|
1 * 1、2 * 2、3 * 3、4 * 4 生成的每个栅格的样式格式类似,只是长、宽比例区别,定义了方法(.video_panel(@count)),这是less的语法,极大的扩展了css功能,非常方便。
3. 关于TerminalMACS及本React Web管理端
3.1. TermainMACS
多终端资源管理与检测系统(后续可能转而写成博客系统),包含多个子进程模块,目前开发了Xamarin.Forms客户端、WPF管理端、React Web管理端、.NET Core WEB API服务端,下一步继续完善WPF管理端(IdentityServer 4研究中)。
3.2. React Web管理端
作为TerminalMACS系统的一个子进程模块,目前使用 Ant Design Pro 搭建了框架,在平时工作中,添加一些测试Demo。
4. 关于项目开源开源项目地址:https://github.com/dotnet9/TerminalMACS
官方网站:https://dotnet9.com
总结
到此这篇关于使用React代码动态生成栅格布局的方法的文章就介绍到这了,更多相关react 动态生成栅格布局内容请搜索脚本之家以前的文章或继续浏览下面的相关文章希望大家以后多多支持脚本之家!
武汉格发信息技术有限公司,格发许可优化管理系统可以帮你评估贵公司软件许可的真实需求,再低成本合规性管理软件许可,帮助贵司提高软件投资回报率,为软件采购、使用提供科学决策依据。支持的软件有: CAD,CAE,PDM,PLM,Catia,Ugnx, AutoCAD, Pro/E, Solidworks 等。
 技术文档
技术文档
 推荐好文
推荐好文


 155-2731-8020


